


What Should You Check in a Custom Motorcycle Suit Design Proof Before Approving Production?
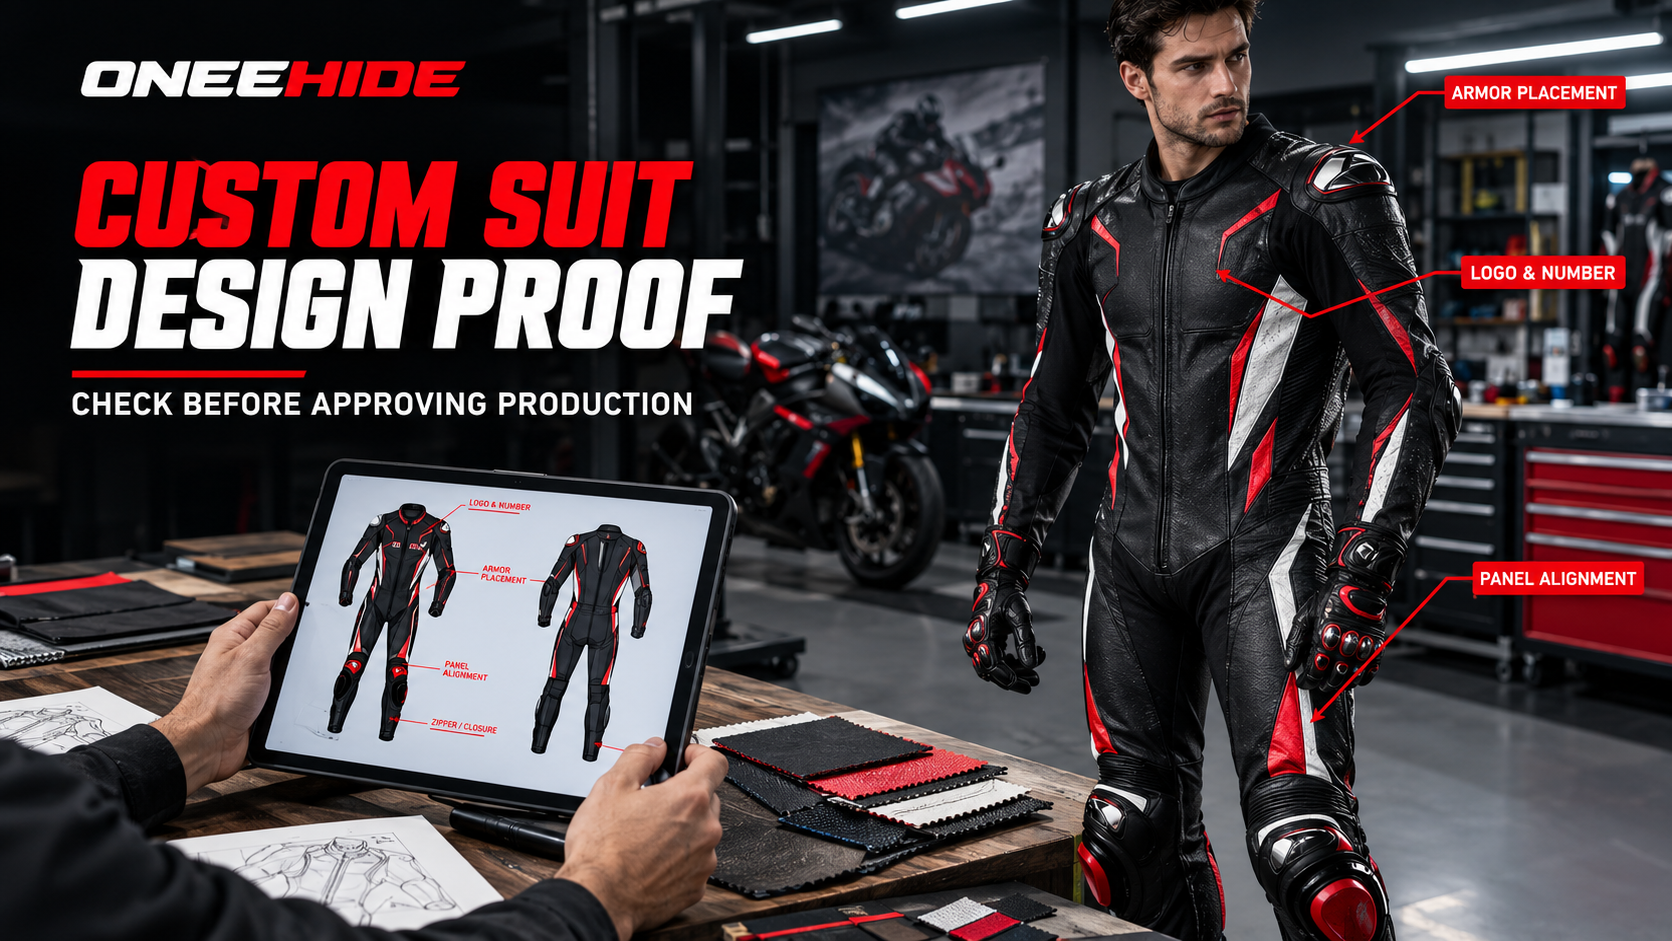
A custom motorcycle suit design proof can look perfect on a screen and still contain mistakes that become expensive or difficult to correct once manufacturing begins. A logo may cross a seam in the wrong place, a sponsor name may be misspelled, or the illustrated knee and elbow panels may not match the configuration you discussed with the manufacturer. These details are easier to resolve before the first piece of material is cut.
The safest approach is to treat the proof as a document that needs careful review, not simply an attractive preview of your finished suit. Riders should check the artwork, panel layout, sizing information, protective components, ventilation, closures, and any race-specific requirements before authorizing production.
A useful approval process also distinguishes between visual accuracy and protective performance. A digital mockup can show how a suit is intended to look, but it cannot independently establish how the finished garment will fit, how its seams will perform, or whether it meets a particular motorcycle protective clothing standard.
1. Confirm That the Design Proof Matches Your Original Request
Start by comparing the proof with the details submitted during the ordering process. Do not rely on memory or assume that the manufacturer has interpreted every instruction correctly.
Review the proof against your original design brief, reference images, written specifications, and any changes agreed during consultation. The goal is to identify differences between what you requested and what the manufacturer intends to produce.
Check these details first:
-
Color placement: Confirm the main colors, accent panels, contrast areas, and transitions between sections.
-
Personalization: Check your name, race number, national flag, sponsor names, and other requested details.
-
Suit configuration: Verify that the illustration represents the correct one-piece or two-piece design.
-
Material and finish: Confirm the agreed leather choice, perforation pattern, and any contrasting material or texture.
-
Additional features: Check the requested hump, sliders, ventilation areas, and other accessories where applicable.
-
Fit specification: Make sure the proof or associated order record identifies the intended fit, such as a racing fit, touring fit, or made-to-measure configuration.
Pay particular attention to changes introduced during revisions. A manufacturer may correctly update the colors while accidentally leaving an older logo, number, or panel arrangement in another view.
Keep the latest approved version identifiable by a revision number, date, or clearly named file. If several versions are circulating through email or messaging, ask the manufacturer to confirm which one will govern production.
This first review establishes a reliable baseline. Every subsequent check should refer to the same version so that approval does not become ambiguous.
2. Inspect the Suit From Every View, Not Just the Front
A front-facing illustration provides only part of the information needed to approve a custom design. Motorcycle suits have multiple panels, curved surfaces, seams, and articulation points, so an arrangement that looks balanced from one angle can become distorted elsewhere.
Review the front, back, both sides, arms, legs, collar, and any other views supplied. If the proof does not show a particular area clearly, request an additional view before approving it.
Look closely at how graphics interact with the garment's construction.
A large logo positioned across a curved shoulder, for example, may appear straight in a flat illustration but wrap awkwardly around the finished garment. Similarly, a stripe running down a leg may look continuous in the drawing yet become misaligned where separate panels meet.
Check the following areas individually:
Shoulders and upper arms: Look for logos, contrasting panels, and stripes that may shift around curved surfaces.
Chest and abdomen: Verify sponsor placement, name positioning, and symmetry between left and right sides.
Back and aerodynamic hump: Confirm that important graphics remain visible and that the artwork reflects the actual hump configuration, if one is included.
Knees and lower legs: Examine knee sliders, reinforced areas, leg graphics, and any design elements that approach boots or closures.
Waist and torso connections: For a two-piece suit, verify the intended jacket-to-trouser connection and the alignment of graphics around that transition.
Do not expect every decorative line to form a perfectly uninterrupted shape across a seam. Construction may require small transitions. What matters is whether those transitions are intentional and consistent with the approved design.
Request close-up views where precise placement matters. A full-body rendering is useful for evaluating the overall appearance, while enlarged panel views can reveal lettering, stitching boundaries, and small alignment problems.
3. Verify Names, Numbers, Logos, and Sponsor Artwork
Personalization errors are among the easiest mistakes to catch before production, yet they can be costly to correct after a suit has been manufactured.
Read every name, number, sponsor reference, and label character by character. Do not assume that supplied artwork has been reproduced accurately simply because the logo looks familiar.
Check spelling, capitalization, punctuation, number orientation, and the placement of each graphic. If your chosen race number contains similar-looking characters, inspect it at a larger scale. Confirm that the left and right sides use the intended versions of the artwork.
Logo placement also needs practical consideration. A large graphic may appear attractive in a flat preview but become difficult to read when the rider bends forward into a racing position. A sponsor mark may also be partly obscured by a hump, protective panel, or natural fold in the garment.
Review the file quality as well. A low-resolution reference image can appear acceptable in a small mockup but produce poor edges or unclear details when enlarged for manufacturing. Ask whether the manufacturer needs a vector file or another high-resolution format for precise reproduction.
Before approval, create a single written record of all personalization details. Include the exact text, number, logo files, intended positions, and any restrictions on stretching or modifying the supplied artwork.
This record reduces the risk of confusion between a visual reference and the actual production instructions.
4. Match the Proof to the Suit's Fit and Measurements
The fit specification is one of the most consequential parts of a custom order. A visually accurate proof does not guarantee that the finished suit will fit correctly or keep its protective components positioned as intended.
Review the sizing information supplied with the proof or order confirmation. Check that the manufacturer's recorded measurements correspond to the measurements you submitted, particularly if you have unusual proportions or requested specific adjustments.
Pay attention to torso length, shoulder width, arm length, waist, hip circumference, thigh circumference, knee position, and leg length. These dimensions work together, so changing one area can affect how the suit sits elsewhere.
A suit designed for an aggressive track position may fit differently from one intended for more upright road riding. The required freedom of movement, amount of pre-curved shaping, and tolerance for folds can vary with the riding position.
Think about how you sit on your motorcycle. In a forward-leaning position, the shoulders, elbows, knees, and hips move into different relationships than they have when you stand upright. A suit that seems comfortable while standing may pull across the back or restrict movement around the crotch when you reach for the handlebars.
For a made-to-order purchase, a useful checkpoint is whether the manufacturer handles visual mockups, revisions, and measurements as distinct stages. The ordering process described for a custom motorcycle racing suit, for example, includes digital design review and revisions before measurements are submitted for manufacturing. That separation helps riders identify artwork problems without overlooking the need to verify fit information.
Before giving approval, establish whether the submitted measurements are final and whether the fit specification reflects your actual use. If you are unsure how to take a measurement, follow the manufacturer's measurement guide or consult a professional tailor rather than estimating.
5. Check Armor Locations, Protective Panels, and Airbag Compatibility
The protective configuration requires a different kind of review from the visual design. A suit can have precisely positioned graphics and still require clarification about its impact protectors, protective coverage, or compatibility with other safety equipment.
Check the written product specification alongside the proof. Confirm the agreed arrangement of shoulder, elbow, knee, hip, and back protection, as applicable to the particular suit. Also verify whether the protectors are removable, included with the order, or intended to be purchased separately.
A flat image can show where a protector is expected to sit, but it cannot prove that the protector will remain correctly positioned when the rider moves. Ask the manufacturer how the protective pockets, fastening systems, and garment fit are intended to maintain placement.
Relevant standards provide a useful reference point. The EN 1621 series covers motorcycle impact protectors, while EN 17092 addresses motorcycle protective garments. The latter has five classes: AAA, AA, A, B, and C. These are distinct garment classifications with different requirements, not interchangeable labels that can be inferred from the appearance of a suit.
The SATRA explanation of EN 17092 motorcycle protective clothing describes the differences between these classes. In particular, Class B garments do not include impact protectors, while Class C garments are designed to hold impact protectors and do not provide the same complete abrasion protection as the protective garment classes intended for that purpose.
If the suit is advertised as certified, ask which exact model or configuration has been assessed and what documentation supports the claim. Custom colors or logos alone do not establish a safety problem, but you should not assume that every possible change to the garment's construction or protective configuration is automatically covered by a certification.
Airbag compatibility deserves separate attention. If you use a wearable airbag system, confirm the exact system intended for use, the suit's accommodation for it, and the manufacturer's instructions for compatibility and fit. Do not rely solely on an illustration containing an airbag-ready label.
Riders entering organized competition should also check the applicable championship or event regulations. Requirements can be more specific than those for ordinary road riding, including provisions for protective equipment and eligible airbag systems. The 2026 FIM WorldSBK regulations provide an example of competition-specific requirements, but they should not be treated as universal rules for every track or racing series.
6. Review Material, Perforation, Seams, and Closures
The materials and construction details influence comfort, durability, and the intended use of the suit. The design proof should therefore agree with the product specification rather than leaving important details to visual interpretation.
Confirm the selected leather or other specified materials, finish, stretch panels, lining, and perforation pattern. If several material options were discussed, make sure the final selection is explicitly recorded.
Perforation is particularly worth checking carefully. Ventilation holes can improve airflow, but their placement should be consistent with the manufacturer's intended construction and protective design. Do not request additional perforation in a protective area without asking how it affects the garment's specified performance.
Examine the illustrated placement of closures and reinforced areas as well. Check the expected location of the main zipper, cuffs, ankle closures, and any fastening straps or adjustment features. If a zipper is intended to close beneath a flap, the proof should communicate that arrangement clearly enough for the manufacturer to identify it.
Look at stretch panels around the shoulders, elbows, crotch, knees, and other articulation points where they are included. These panels serve a functional purpose, not merely a decorative one. Their location should make sense for the rider's posture and the suit's intended construction.
Ask for clarification whenever a material or construction detail appears inconsistent with the specification. A digital mockup is not a technical drawing of every internal seam, reinforcement, or protective layer. The manufacturer should confirm construction details that cannot be verified visually.
If a change affects material, reinforcement, panel construction, or protective coverage, record the manufacturer's response in writing before approving it.
7. Confirm Whether the Suit Meets Your Intended Use
A design proof should reflect how you plan to use the suit, not just how you want it to look.
Road riders, occasional track-day participants, and competitive racers may have different priorities. A touring-oriented fit can favor comfort in a more upright position, while an aggressive racing fit is shaped around a more forward-leaning posture. Ventilation, flexibility, aerodynamic features, and protective components also vary by design.
Before approving the proof, confirm that the configuration matches your intended riding:
-
Road use: Check that the fit allows comfortable control of the motorcycle and that the suit's protective specification matches your needs.
-
Track days: Verify the fit in a tucked riding position, the placement of knee sliders where applicable, and any venue-specific equipment rules.
-
Organized competition: Confirm the current technical rules for the relevant series, including requirements for protective equipment and approved systems.
-
Hot-weather riding: Review the agreed perforation and ventilation configuration without assuming that more airflow always means better overall protection.
Material selection should also be evaluated in context. Different leather types and textile or stretch components have different characteristics, but the name of a material by itself does not establish the finished suit's performance. Construction, reinforcement, seams, fit, and testing all matter.
A manufacturer should be able to explain which specifications apply to your chosen configuration. Request clarification before approval if the order description and design proof suggest different equipment or uses.
The important distinction is between selecting features that suit your riding style and assuming that a visual customization automatically improves safety. The proof should accurately represent the agreed configuration, while performance claims should be supported by appropriate product documentation.
8. Get Written Confirmation Before Authorizing Production
Once the visual and technical reviews are complete, make the approval decision explicit. Avoid relying on a brief message such as "looks good" when several versions or unresolved questions exist.
Ask the manufacturer to confirm that the approved proof corresponds to the final production instructions. The confirmation should cover the selected materials, suit type, fit specification, submitted measurements, personalization, protective configuration, ventilation, and any accessories included in the order.
Keep a copy of the final proof and the related correspondence. If the manufacturer provides separate artwork files, measurement records, or a specification sheet, retain those documents with the approved version.
There is also an important distinction between approving the design and accepting the finished product. Approval generally confirms the agreed design details, but it does not remove the need to inspect the delivered suit for workmanship, correct components, damage, and conformity with the order.
For products marketed as personal protective equipment in the European Union, Regulation (EU) 2016/425 sets out manufacturer obligations, including applicable conformity assessment, technical documentation, and CE marking requirements. The regulation also addresses protective clothing supplied with removable protectors, which must be assessed as a combination during conformity assessment. A design proof alone is not evidence that these requirements have been met.
Before approving production, resolve any discrepancy between the rendering, measurement record, product specification, and safety documentation. If an important detail remains unclear, request a revised proof or written clarification rather than assuming the manufacturer will correct it later.
A well-reviewed design proof provides a clear record of what has been agreed, what will be manufactured, and which questions still require an answer. By checking appearance, fit, construction, protective components, and intended use separately, riders can approve their custom suit with a much clearer understanding of what they are ordering.

 English